Location: Assets/Plugins/Animancer/Examples/06 State Machines/04 Weapons
Recommended After: Brains
Learning Outcomes: in this example you will learn:
How to allow a character to equip different weapons.
How have each weapon define its own animation details for the character to use.
How to use
StateMachine<T>.InputBuffers.How to disable an
OptionalWarningwhen you understand the risks it's warning about.
This example expands upon the Brains example to allow a character hold various items and get their animations from those items so each one can have different animations. It only uses this system for Attack, Equip, and UnEquip animations, but the concept could be extended to other animations such as having a different Idle or Walk animation to hold the weapon correctly.
Summary
- Animancer doesn't know or care where your animations are defined, so there's no need for all of them to be defined on the character.
- In this case, a weapon prefab holds the animations that a character will use when they equip it.
- Input Buffering can help make a game feel more responsive to the player by accepting button presses that were slightly too early for the corresponding actions to be performed.
Controls
- WASD = Move
- Left Shift = Run
- Left Click = Attack
- Right Click = Change Weapon
Licensing
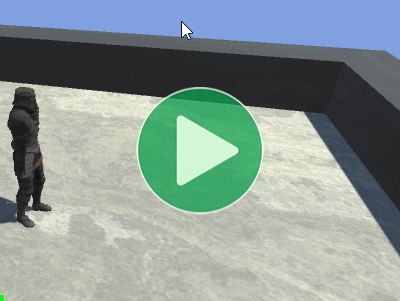
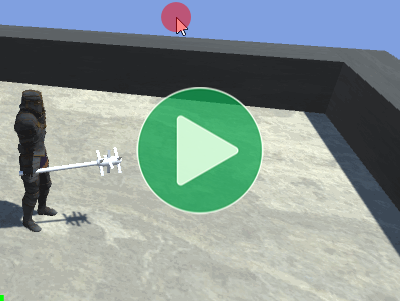
The top video was made using the scripts from this example on a character called Paladin J Nordstrom from Mixamo along with various animations. Unfortunately, those assets can't be legally redistributed in their raw source form, meaning that they can't be included in Animancer. So instead, the actual example scene reuses the props and animations from earlier examples. This also avoids needing a large number of animations which would only be used in this one example.
Overview
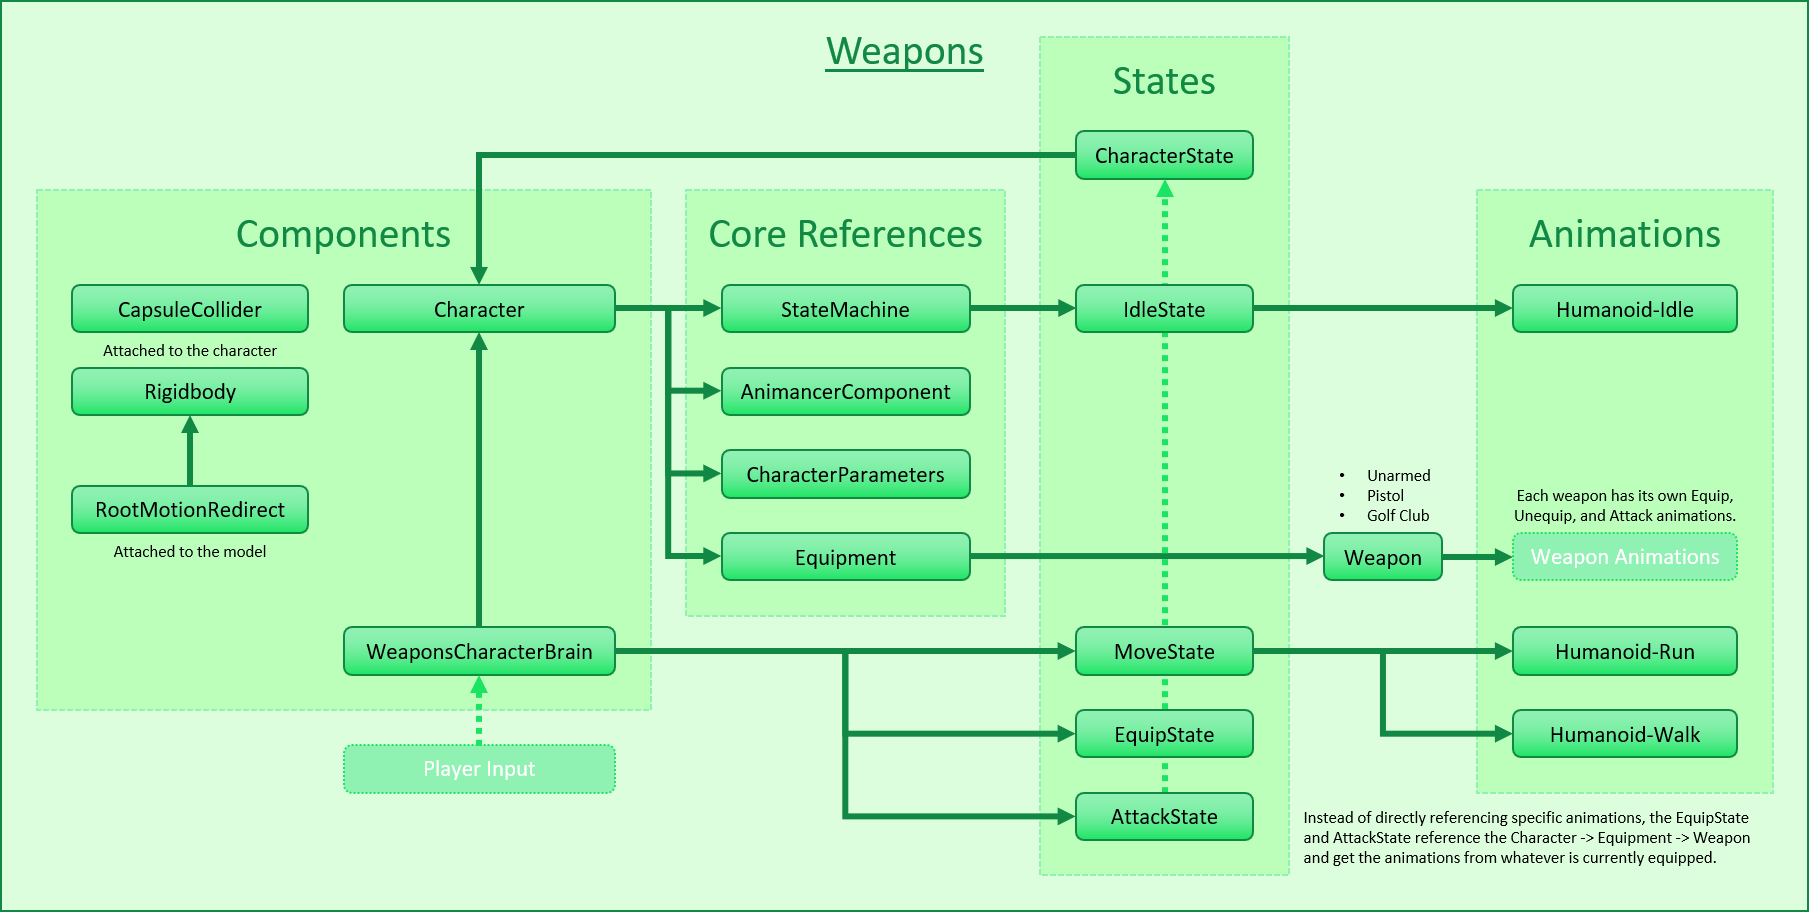
The general code structure is similar to the Brains example, with a few changes:
MovingCharacterBrainhas been replaced byWeaponsCharacterBrain.ActionStatehas been replaced byEquipStateandAttackStatewhich don't reference their animations directly. Instead, they get their animations from the currently equippedWeapon.
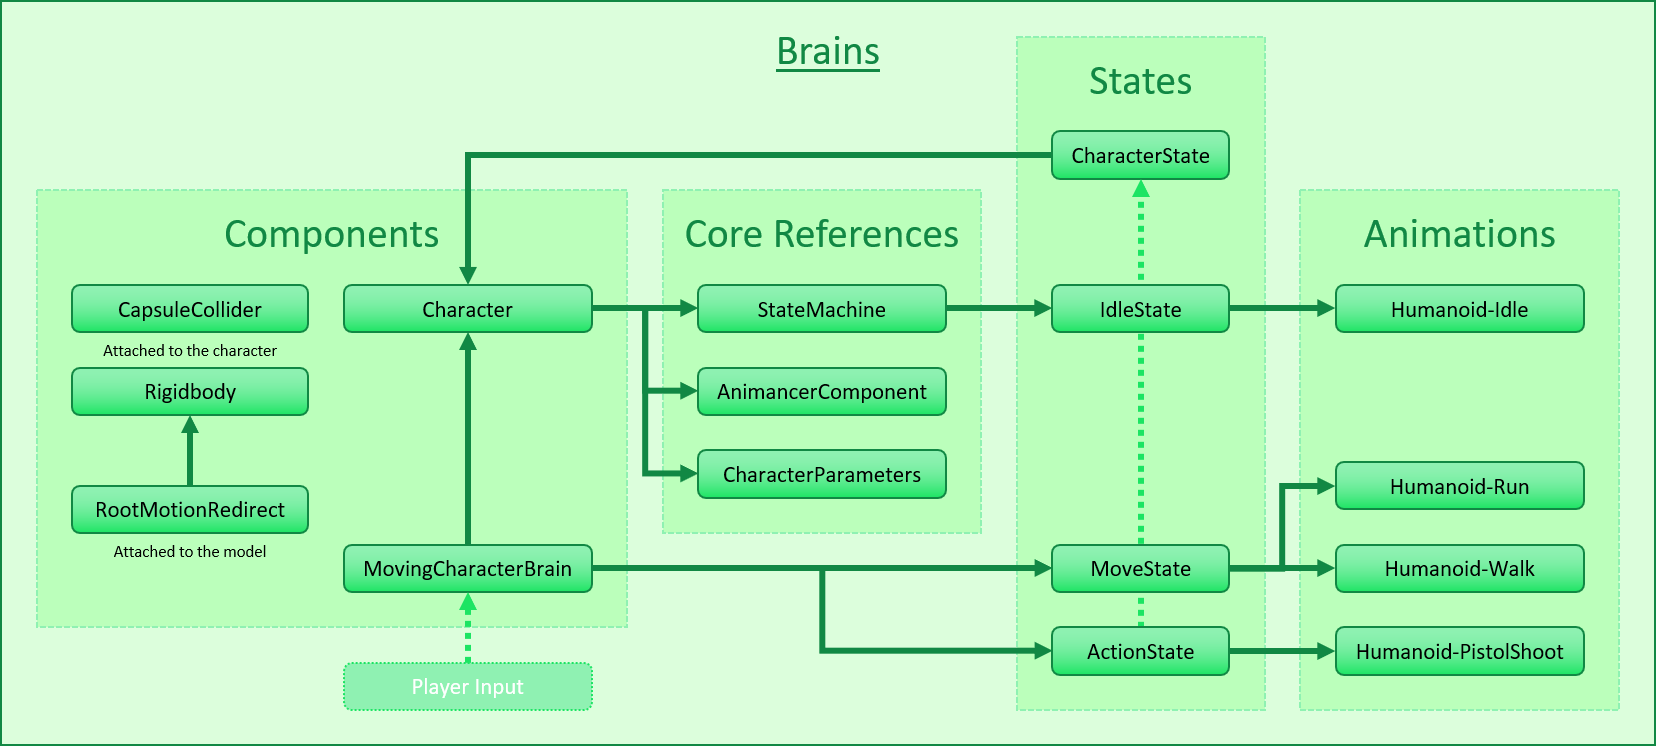
Click here to show the code structure from the Brains example:
Weapon
The main purpose of this example is to demonstrate how animations can be defined separately from a character. That's what the Weapon class is for, it holds the animations relating to a particular weapon so that when a character equips it they can play appropriate animations for it:
using Animancer;
using UnityEngine;

public sealed class Weapon : MonoBehaviour
{
It has an array of animations for the Attack State to use in sequence if the character attacks repeatedly:
    [SerializeField]
    private ClipTransition[] _AttackAnimations;
    public ClipTransition[] AttackAnimations => _AttackAnimations;
And animations for the Equip State to use when changing to this weapon and before changing to another weapon:
    [SerializeField]
    private ClipTransition _EquipAnimation;
    public ClipTransition EquipAnimation => _EquipAnimation;

    [SerializeField]
    private ClipTransition _UnequipAnimation;
    public ClipTransition UnequipAnimation => _UnequipAnimation;
}
In a real game, this class might have other details like damage, damage type, weapon category, etc. It could also Inherit from a base Item class for things like weight, cost, and description.
Weapon Prefabs
Implementing Weapon as a component means that each one can be set up along with its model as a prefab. This offers great flexibility in how they can be used, such as to have a character pick up or drop a weapon or to dynamically load individual weapons when they are needed instead of directly referencing all available weapons at once (which would mean they are all loaded at all times).
But all that is beyond the scope of this example. Here we're just showing how animations can be defined outside of the logical state that uses them so the weapons are just objects in the scene and the Weapons Character Brain references them all in an array:
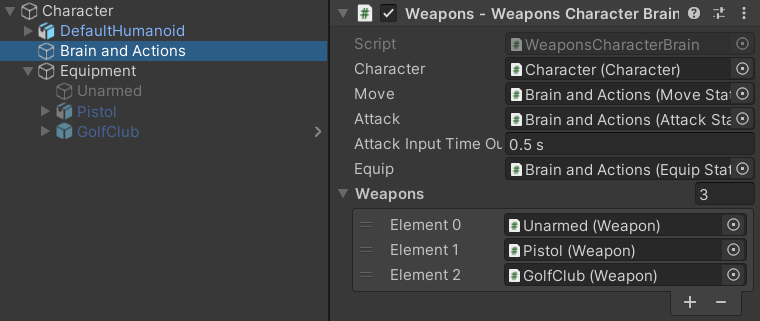
Animancer Weapons
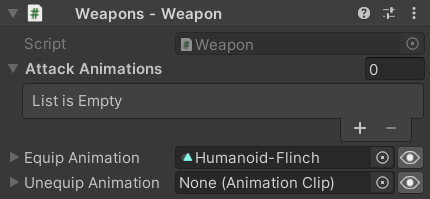
The weapons in the example scene are a bit limited because they're only reusing assets from other examples. They all use Humanoid-Flinch as their Equip Animation and have no Unequip Animation.
Unarmed doesn't have any attacks:

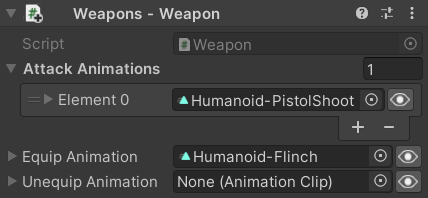
Pistol has one attack using Humanoid-PistolShoot:

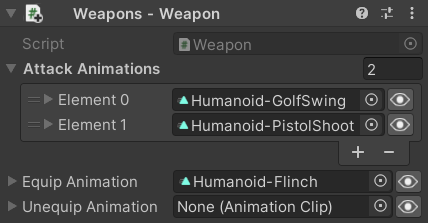
Golf Club has an attack using Humanoid-GolfSwing then Humanoid-PistolShoot (it looks silly, but it at least shows how one attack animation chains into the next if you attack repeatedly):
Mixamo Weapons
The Mixamo weapons used for the first video are a bit more detailed.
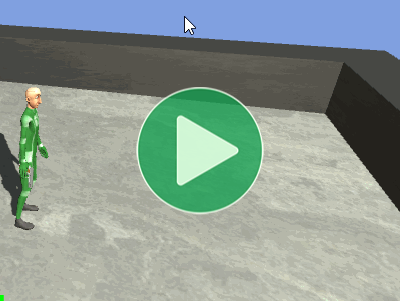
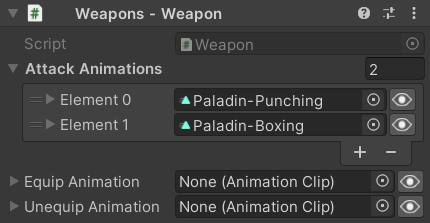
Unarmed has two attacks but no equip or unequip animation:
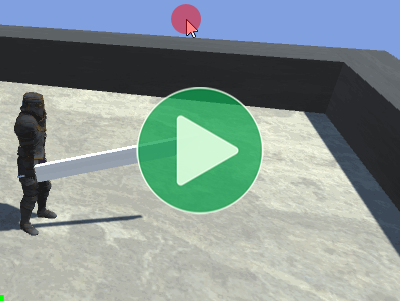
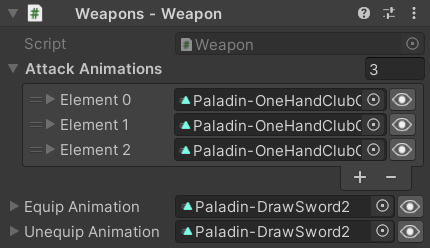
Club has three attacks and one animation for both equip and unequip:
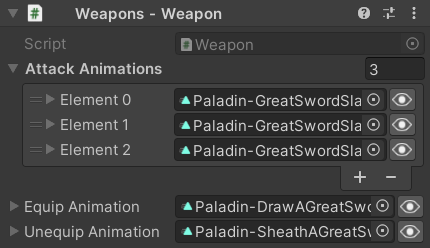
Great Sword has three attacks and separate animations for equip and unequip:
Equipment
The Character class has a reference to an Equipment component:
class Character
{
    ...

    [SerializeField]
    private Equipment _Equipment;
    public Equipment Equipment => _Equipment;
}
The Holding a Pistol page explains how to put an object in the character's hand. This example does the same thing in the Equipment script by giving it a reference to the Transform of the RightHandHolder bone so it can re-parent weapons to that bone when they are equipped:
public sealed class Equipment : MonoBehaviour
{
    [SerializeField] private Transform _WeaponHolder;
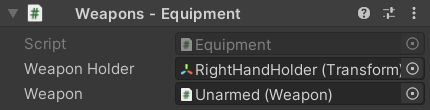
It also has a reference to the currently equipped Weapon with a public wrapper property:
    [SerializeField] private Weapon _Weapon;

    public Weapon Weapon
    {
        get => _Weapon;
When the Weapon is changed, it detaches the old weapon from the _WeaponHolder and attaches the new one to it:
        set
        {
            DetachWeapon();
            _Weapon = value;
            AttachWeapon();
        }
    }
And it also needs to attach the current weapon on startup:
    private void Awake()
    {
        AttachWeapon();
    }
Attaching a weapon involves setting the _WeaponHolder as its parent, clearing its local Transform values, and activating its GameObject:
    private void AttachWeapon()
    {
        if (_Weapon == null)
            return;

        var transform = _Weapon.transform;
        transform.parent = _WeaponHolder;
        transform.localPosition = Vector3.zero;
        transform.localRotation = Quaternion.identity;
        transform.localScale = Vector3.one;

        _Weapon.gameObject.SetActive(true);
    }
And detaching a weapon is even simpler, it just sets this Equipment script's Transform as its parent and deactivates its GameObject:
    private void DetachWeapon()
    {
        if (_Weapon == null)
            return;

        _Weapon.transform.parent = transform;
        _Weapon.gameObject.SetActive(false);
    }
}
In a real game, attaching and detaching a weapon might involve instantiating and destroying a prefab or leaving it active in the scene.
Equip State
The EquipState script is a bit more complex than the states in earlier examples because it handles both the unequipping and equipping animations:
using Animancer;
using System;
using UnityEngine;

public sealed class EquipState : CharacterState
{
    private Action _OnUnequipEnd;

    public Weapon NextWeapon { get; set; }

    public Weapon CurrentWeapon => Character.Equipment.Weapon;

    private void Awake()
    {
        _OnUnequipEnd = OnUnequipEnd;
        NextWeapon = CurrentWeapon;

        OptionalWarning.LockedEvents.Disable();
    }

    public override bool CanEnterState =>
        !enabled &&
        NextWeapon != CurrentWeapon;

    private void OnEnable()
    {
        if (CurrentWeapon.UnequipAnimation.IsValid)
        {
            var state = Character.Animancer.Play(CurrentWeapon.UnequipAnimation);
            state.Events.OnEnd = _OnUnequipEnd;
        }
        else
        {
            OnUnequipEnd();
        }
    }

    private void OnUnequipEnd()
    {
        Character.Equipment.Weapon = NextWeapon;

        if (CurrentWeapon.EquipAnimation.IsValid)
        {
            var state = Character.Animancer.Play(CurrentWeapon.EquipAnimation);
            state.Events.OnEnd = Character.StateMachine.ForceSetDefaultState;
        }
        else
        {
            Character.StateMachine.ForceSetDefaultState();
        }
    }

    public override CharacterStatePriority Priority => CharacterStatePriority.Medium;
}
It has two Weapons:
- The
NextWeaponneeds to be set by whatever script tries to enter this state (in this example, that's the Brain). - The
CurrentWeaponis just a shortcut to get the current weapon from theEquipmentscript since it will be used several times throughout this script.
public Weapon NextWeapon { get; set; }

public Weapon CurrentWeapon => Character.Equipment.Weapon;

private void Awake()
{
    ...
    NextWeapon = CurrentWeapon;
    ...
This state can only be entered if it isn't already in progress (it can't interrupt itself) and if the NextWeapon has been set to something different from the CurrentWeapon:
public override bool CanEnterState =>
    !enabled &&
    NextWeapon != CurrentWeapon;
When this state plays an UnequipAnimation, it will use an End Event to change the current weapon. The Garbage Collection page explains how to avoid a potential performance issue when using events, which is to store the callback you want to use in a field so that its delegate doesn't need to be re-allocated every time you use it:
private Action _OnUnequipEnd;

private void Awake()
{
    _OnUnequipEnd = OnUnequipEnd;

    ...
}

private void OnUnequipEnd() { ... }// Explained below.
In this example we assign End Event to the weapon's animations each time they're used. In most situations, events on a transition should be set only once on startup because any changes will modify the transition's events cumulatively. Animancer would log a warning about that because it's a common source of bugs, but in this example we know what we're doing so we just disable the warning:
private void Awake()
{
    ...
    OptionalWarning.LockedEvents.Disable();
}
When entering this state, if the CurrentWeapon (the previously equipped weapon) has a valid UnequipAnimation, play it and tell it to use the cached event, but if there is no animation just pretend it ended immediately:
private void OnEnable()
{
    if (CurrentWeapon.UnequipAnimation.IsValid)
    {
        var state = Character.Animancer.Play(CurrentWeapon.UnequipAnimation);
        state.Events.OnEnd = _OnUnequipEnd;
    }
    else
    {
        OnUnequipEnd();
    }
}
When the UnequipAnimation ends (or is skipped), change the actual equipped weapon then do basically the same as before with the new weapon's EquipAnimation. This time when the animation ends it will end this state with ForceSetDefaultState (which is already a cached delegate):
private void OnUnequipEnd()
{
    Character.Equipment.Weapon = NextWeapon;

    if (CurrentWeapon.EquipAnimation.IsValid)
    {
        var state = Character.Animancer.Play(CurrentWeapon.EquipAnimation);
        state.Events.OnEnd = Character.StateMachine.ForceSetDefaultState;
    }
    else
    {
        Character.StateMachine.ForceSetDefaultState();
    }
}
And finally, this state has Medium priority to control what can Interrupt it:
public override CharacterStatePriority Priority => CharacterStatePriority.Medium;
Attack State
The AttackState script plays animations from current weapon's AttackAnimations array. When entered it starts with the first attack, but if re-entered while the previous attack is still fading out it plays the next attack in the array:
using Animancer;
using UnityEngine;

public sealed class AttackState : CharacterState
{
    private int _AttackIndex = int.MaxValue;

    public Weapon Weapon => Character.Equipment.Weapon;

    public override bool CanEnterState =>
        Weapon != null &&
        Weapon.AttackAnimations.Length > 0;

    private void OnEnable()
    {
        if (ShouldRestartCombo())
        {
            _AttackIndex = 0;
        }
        else
        {
            _AttackIndex++;
        }

        var animation = Weapon.AttackAnimations[_AttackIndex];
        animation.Events.OnEnd = Character.StateMachine.ForceSetDefaultState;

        Character.Animancer.Play(animation);
    }

    private bool ShouldRestartCombo()
    {
        var attackAnimations = Weapon.AttackAnimations;

        if (_AttackIndex >= attackAnimations.Length - 1)
            return true;

        var state = attackAnimations[_AttackIndex].State;
        if (state == null ||
            state.Weight == 0)
            return true;

        return false;
    }

    public override CharacterStatePriority Priority => CharacterStatePriority.Medium;
}
This state uses a simple int to keep track of which attack it's up to in the array. Each time the state is entered it either restarts from 0 or increments to the index:
private int _AttackIndex = int.MaxValue;

private void OnEnable()
{
    if (ShouldRestartCombo())
    {
        _AttackIndex = 0;
    }
    else
    {
        _AttackIndex++;
    }

    ...
}
There are two things that will cause it to restart:
- If the index is already at the last animation.
- Or if the previous animation has already faded out fully (or hasn't been initialized yet).
private bool ShouldRestartCombo()
{
    var attackAnimations = _Equipment.Weapon.AttackAnimations;

    if (_AttackIndex >= attackAnimations.Length - 1)
        return true;

    var state = attackAnimations[_AttackIndex].State;
    if (state == null ||
        state.Weight == 0)
        return true;

    return false;
}
Once it knows which attack it's up to, it can simply play that animation and set itss End Event to return to the default state (Idle):
private void OnEnable()
{
    ...

    var animation = Weapon.AttackAnimations[_AttackIndex];
    animation.Events.OnEnd = Character.StateMachine.ForceSetDefaultState;

    Character.Animancer.Play(animation);
}
And just like with the EquipState, this state has Medium priority to control what can Interrupt it:
public override CharacterStatePriority Priority => CharacterStatePriority.Medium;
Weapons Character Brain
The WeaponsCharacterBrain script has the same movement code as MovingCharacterBrain, but has a few other additions:
- It uses an
InputBuffer so that if a button is pressed before the corresponding state change is allowed, it will continue attempting the same state change for a short time.
- It references the
EquipState to change the equipped weapon.
- It has an array of
Weapons to cycle through.
InputBuffer so that if a button is pressed before the corresponding state change is allowed, it will continue attempting the same state change for a short time.EquipState to change the equipped weapon.Weapons to cycle through.
using Animancer.FSM;
using Animancer.Units;
using System;
using UnityEngine;

public sealed class WeaponsCharacterBrain : MonoBehaviour
{
    [SerializeField] private Character _Character;
    [SerializeField] private CharacterState _Move;
    [SerializeField] private CharacterState _Attack;
    [SerializeField, Seconds] private float _InputTimeOut = 0.5f;
    [SerializeField] private EquipState _Equip;
    [SerializeField] private Weapon[] _Weapons;

    private StateMachine<CharacterState>.InputBuffer _InputBuffer;

    private void Awake()
    {
        _InputBuffer = new StateMachine<CharacterState>.InputBuffer(_Character.StateMachine);
    }

    private void Update()
    {
        UpdateMovement();
        UpdateEquip();
        UpdateAction();

        _InputBuffer.Update();
    }

    private void UpdateMovement()// This method is identical to the one in MovingCharacterBrain.
    {
        var input = ExampleInput.WASD;
        if (input != default)
        {
            // Get the camera's forward and right vectors and flatten them onto the XZ plane.
            var camera = Camera.main.transform;

            var forward = camera.forward;
            forward.y = 0;
            forward.Normalize();

            var right = camera.right;
            right.y = 0;
            right.Normalize();

            // Build the movement vector by multiplying the input by those axes.
            _Character.Parameters.MovementDirection =
                right * input.x +
                forward * input.y;

            // Enter the locomotion state if we aren't already in it.
            _Character.StateMachine.TrySetState(_Move);
        }
        else
        {
            _Character.Parameters.MovementDirection = default;
            _Character.StateMachine.TrySetDefaultState();
        }

        // Indicate whether the character wants to run or not.
        _Character.Parameters.WantsToRun = ExampleInput.LeftShiftHold;
    }

    private void UpdateEquip()
    {
        if (ExampleInput.RightMouseDown)
        {
            var equippedWeaponIndex = Array.IndexOf(_Weapons, _Character.Equipment.Weapon);

            equippedWeaponIndex++;
            if (equippedWeaponIndex >= _Weapons.Length)
                equippedWeaponIndex = 0;

            _Equip.NextWeapon = _Weapons[equippedWeaponIndex];
            _InputBuffer.Buffer(_Equip, _InputTimeOut);
        }
    }

    private void UpdateAction()
    {
        if (ExampleInput.LeftMouseDown)
        {
            _InputBuffer.Buffer(_Attack, _InputTimeOut);
        }
    }
}
Input Buffering
Input Buffering is a technique where a failed state change is continually re-attempted after the initial input until it succeeds or a short timer elapses. This makes things easier for the player to control by giving them a larger window of time during which they can perform actions.
To use it in Animancer's Finite State Machine system, you first initialize an InputBuffer with the StateMachine it will control:
private StateMachine<CharacterState>.InputBuffer _InputBuffer;

private void Awake()
{
    _InputBuffer = new StateMachine<CharacterState>.InputBuffer(_Character.StateMachine);
}
To perform an action, call Buffer with the desired state and a "Time Out" value to determine how long the buffer will last (it could be hard coded, but being exposed in the Inspector makes it easy to tweak and test different values):
[SerializeField, Seconds] private float _InputTimeOut = 0.5f;

private void UpdateAction()
{
    if (ExampleInput.LeftMouseDown)
    {
        _InputBuffer.Buffer(_Attack, _InputTimeOut);
    }
}
And finally, call Update on the buffer every time you want it to make another attempt to enter the state:
private void Update()
{
    UpdateMovement();
    UpdateEquip();
    UpdateAction();

    _InputBuffer.Update();
}
Update Equip
To equip the next weapon, it needs to first figure out which one is equipped:
[SerializeField] private EquipState _Equip;
[SerializeField] private Weapon[] _Weapons;

private void UpdateEquip()
{
    if (ExampleInput.RightMouseDown)
    {
        var equippedWeaponIndex = Array.IndexOf(_Weapons, _Character.Equipment.Weapon);
This script could have a field to store the index, but the equipped weapon isn't actually changing here (only if the EquipState is entered and finishes playing the UnequipAnimation) so that could cause a mismatch between the stored value and the weapon that's actually equipped.
The index is incremented and if it goes past the last weapon in the array, it starts back at 0:
        equippedWeaponIndex++;
        if (equippedWeaponIndex >= _Weapons.Length)
            equippedWeaponIndex = 0;
Then it sets the NextWeapon and buffers the EquipState to try to equip that weapon:
        _Equip.NextWeapon = _Weapons[equippedWeaponIndex];
        _InputBuffer.Buffer(_Equip, _InputTimeOut);
    }
}
If it fails to enter the EquipState or it gets interrupted, that NextWeapon will simply not get used and anything else that tries to enter the state should set its own value first.
What Next?
| Example | Topic |
|---|---|
| Platformer Game Kit | A separate (free) package which demonstrates a much more complete character implementation for a 2D platformer game. |
| 3D Game Kit | A more complex character framework based on Unity's 3D Game Kit Lite. |