Location: Assets/Plugins/Animancer/Examples/01 Basics/04 Transitions
Recommended After: Basic Action
Learning Outcomes: in this example you will learn:
How to use Transitions.
How to smoothly blend between animations.
How to set up animation details like speed and fade duration in the Inspector.
This example implements the same behaviour as the Basic Action example, but with smooth blending between animations (i.e. Cross Fading) instead of instantly snapping between them. It also introduces Transitions which allow the animation details like speed and fade duration to easily be configured and previewed in the Inspector.
Note that while the fade duration is a core feature of Transitions, it's far from their only purpose so they can still be very useful in situations where you don't want to smoothly blend between animations (such as if you're using Sprite animations).
Summary
- You can smoothly blend between animations by specifying how long you want it to take as the second parameter in the
Playmethod. - If you want the animation to start from the beginning, pass in
FadeMode.FromStartas the third parameter. - You can use Transitions to define animation details like the fade duration and speed in the Inspector.
- When using Events with Transitions, you should configure the events on startup instead of adding them to the
AnimancerStateafter you play an animation.
Overview
The code structure initially looks the same as the Basic Action example, but when we introduce Transitions the direct references to AnimationClips get replaced by ClipTransitions which each contain a reference to an AnimationClip (along with other details):

Cross Fading
The character in the Basic Action example is playing the animations we want, but changing between them instantly snaps the character's pose instead of moving smoothly from the previous pose. This can be easily solved by Cross Fading between the animations.
All you need to do is add another parameter to the Play call to tell it how long you want the transition to take:
_Animancer.Play(_Action);// Play instantly.
_Animancer.Play(_Action, 0.25f);// Cross Fade over 0.25 seconds.
Note that Animancer Lite only allows a fade duration of 0.25 seconds. You can try out any duration you want in the Unity Editor, but it will always use the default duration in runtime builds unless you purchase Animancer Pro.
The full script now looks like this:
using Animancer;
using UnityEngine;

public sealed class PlayTransitionOnClick : MonoBehaviour
{
    [SerializeField] private AnimancerComponent _Animancer;
    [SerializeField] private AnimationClip _Idle;
    [SerializeField] private AnimationClip _Action;

    private void OnEnable()
    {
        _Animancer.Play(_Idle, 0.25f);
    }

    private void Update()
    {
        if (ExampleInput.LeftMouseUp)
        {
            AnimancerState state = _Animancer.Play(_Action, 0.25f);
            state.Time = 0;
            state.Events.OnEnd = OnEnable;
        }
    }
}
Note how the OnEnable method includes a fade duration because we're using it as the End Event or the _Action animation. When Unity first calls it on startup, nothing else is playing yet so Animancer will ignore the fade duration and simply play the _Idle animation immediately, but then when the _Action ends it will fade as intended.
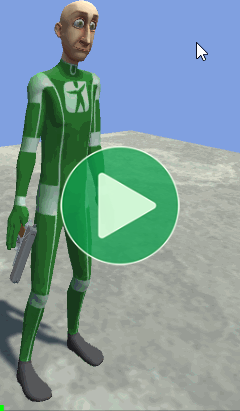
Here's what it looks like in Play Mode:
| Play Immediately | Cross Fade |
|---|---|
 |
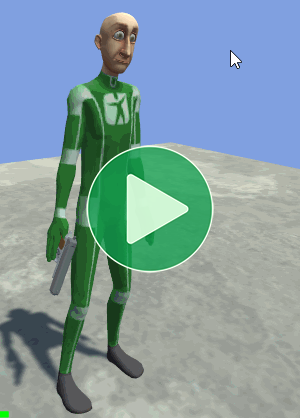 |
Fading from a generic Idle pose into shooting a pistol is rather silly because the actual shot occurs during the fade, but the point of this example is just to show what can be done and how to do it.
Rapid Fire
Specifying a fade duration gives nice smooth blending between two different animations, but doesn't automatically allow an animation to transition into itself because each animation state can only have one Time value and setting it will immediately snap it to the new value.

This issue is addressed by Fade Modes which can be specified as another optional parameter in the Play method. In this case, we want to use FadeMode.FromStart so that it will always fade in from the start of the animation.
AnimancerState state = _Animancer.Play(_Action, 0.25f, FadeMode.FromStart);
state.Events.OnEnd = OnEnable;
Note that we no longer need to set the state.Time = 0 because FadeMode.FromStart already does that.
The full script now looks like this:
using Animancer;
using UnityEngine;

public sealed class PlayTransitionOnClick : MonoBehaviour
{
    [SerializeField] private AnimancerComponent _Animancer;
    [SerializeField] private AnimationClip _Idle;
    [SerializeField] private AnimationClip _Action;

    private void OnEnable()
    {
        _Animancer.Play(_Idle, 0.25f);
    }

    private void Update()
    {
        if (ExampleInput.LeftMouseUp)
        {
            AnimancerState state = _Animancer.Play(_Action, 0.25f, FadeMode.FromStart);
            state.Events.OnEnd = OnEnable;
        }
    }
}
Workflow Problem
We now have the behaviour we want, but there is a slight problem with the development workflow. Specifying the fade duration in code like this makes it clear exactly what the code is doing, but also has several disadvantages:
- You can't easily preview the fade. If you want to see what it will look like you have to enter Play Mode and get to a point where that code is actually executed.
- Non-programmers can't easily modify the fade duration and even programmers still have to go through a tedious process of finding the right line of code, picking a new value that might be better, recompiling, and going into Play Mode to test it again.
Adding a Serialized Field to specify the fade duration in the Inspector would help a bit, but Transitions are usually a much better solution.
Transitions
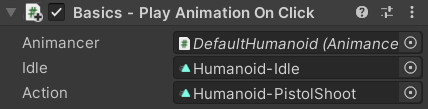
Instead of having an AnimationClip field to directly reference an animation, you can make a ClipTransition field which contains an AnimationClip as well as various other details about how you want it to be played such as a Fade Duration and Start Time.
| Animation Clips (Old) | Clip Transitions (New) |
|---|---|
|
|
 |
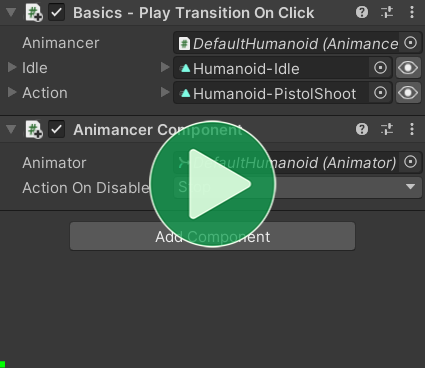 |
We won't be using it here, but the eye icon on the right side of the Inspector for each transition field allows you to Preview it in Edit Mode so you can see what it looks like while tweaking the values.
The Transitions page explains what all the fields do, but in this example we're only interested in two of them:
Fade Duration
We are still using the same fade duration of 0.25 seconds on both the Idle and Action animations, but you can see that same value being displayed in other units as well. The Time Fields section explains how they work.
Start Time
- The
Idleanimation'sStart Timetoggle is unticked, meaning that if it was already playing it will simply continue from its current time. This will use the defaultFadeMode.FixedSpeed. - The
Actionanimation'sStart Timetoggle is ticked, meaning that it will always be set to the specified value (0 in this case) when you play it. This will useFadeMode.FromStartas described above (in the Rapid Fire section).
Events in Transitions
The way that End Events (and other Animancer Events) work is slightly different depending on whether you directly play an AnimationClip or use a Transition. Specifically, this affects the way they are Cleared Automatically when you play another animation. That page explains the system in detail, but in summary:
- Without a transition, you need to initialize any events every time you play the animation.
- But a transition has its own events so you should instead initialize them only once on startup.
- The state is given a direct reference to the transition's events, which means that any events added to the state will get stored in the transition so that next time you play it the old events are still there and you add more copies of the same events (unless you specifically check if they were already there before adding them).
- Initializing on startup is also better for performance because it avoids allocating memory every time you play the animation that would need to be Garbage Collected later on.
This means that after we replace the AnimationClip fields with ClipTransitions we have a few other changes to make as well.
| Animation Clips (Old) | Clip Transitions (New) |
|---|---|
|
|
Previously, all we did on startup was play the _Idle animation. |
We add the End Event to the _Action transition on startup instead of to its state when playing it. |
|
|
The OnEnable method now does more than just play the _Idle animation so we need another method to do just that. |
|
|
|
When we play the _Action, we need to specify its fade duration, fade mode, and end event. |
When we play the _Action, we've already set up everything else we need. |
|
|
The full script now looks like this:
using Animancer;
using UnityEngine;
public sealed class PlayTransitionOnClick : MonoBehaviour
{
[SerializeField]
private AnimancerComponent _Animancer;

[SerializeField]
private ClipTransition _Idle;

[SerializeField]
private ClipTransition _Action;
private void OnEnable()
{
    _Action.Events.OnEnd = OnActionEnd;

    _Animancer.Play(_Idle);
}
private void OnActionEnd()
{
    _Animancer.Play(_Idle);
}
private void Update()
{
    if (ExampleInput.LeftMouseUp)
    {
        _Animancer.Play(_Action);
    }
}
}
In the end, the script using AnimationClips was slightly shorter, but the one using ClipTransitions has a much better development workflow because it keeps purely visual details like the fade duration out of the code for easier customization.
What Next?
| Example | Topic |
|---|---|
| Basic Character | Combining this example with Basic Movement. |